Manage Upload History
Schools and districts that manually upload rosters to EasyBridge can manage the upload history from the Classes tab. After adding or updating a class roster, check the upload history for success messages or errors that need to be addressed.
- Sign in to EasyBridge. The Classes tab appears.
- Select the Bulk Add/Update Classes tab.
- Select the Manage Upload History button.
- Select the row that has errors.
- Correct errors directly in the .csv file and re-upload the file using the Re-upload spreadsheet button, or Finish later if multiple corrections are required.
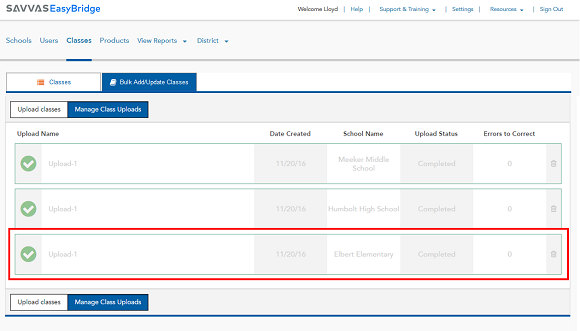
Example of Upload with no Errors
Uploads successfully completed. No further actions are needed.
Example of Errors to Correct
Select the row with errors to see the specific error and row number to be corrected in the .csv file.


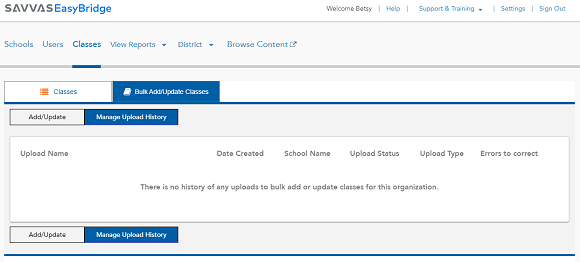
Example of No Uploads
If no uploads, either bulk add or bulk update, have been attempted for the organization, no history are displayed.
| Error | Action to correct |
| Student username cannot be blank | Locate blank student username(s) in upload file and enter username(s). Re-upload spreadsheet. |
| Teacher not affiliated with this school | Review file to find unaffiliated teacher. Remove teacher from file, and re-upload spreadsheet. |
| Student not affiliated with this school | Review file to find unaffiliated student. Remove student from file, and re-upload spreadsheet. |
| Student username not found | Review file to locate missing student username. Enter correct username and re-upload spreadsheet. |
| There is an error in the header. Correct it to read Class ID. | Review the header rows in the file and make corrections for Class ID. |
| There is an error in the header. Correct it to read Delete Student Enrollment (Y). | Review the header rows in the file and make corrections for Delete Student Enrollment (Y).. |