Manage Products on Class Details Page
Add Products to Individual Classes
To easily add or remove products for specific classes and view teachers’ product selections. Follow the steps below to Manage products for specific classes.
- Go to SavvasEasyBridge.
- Select Sign in/Administrator sign in and enter the username and password.
- Use Filter classes to quickly find a class. Classes can be filtered by roster source(s), class name, class code, SIS source Id, subject, primary teacher, school name, grade, class type, and course name.
- Select the class name. The class details page appears.
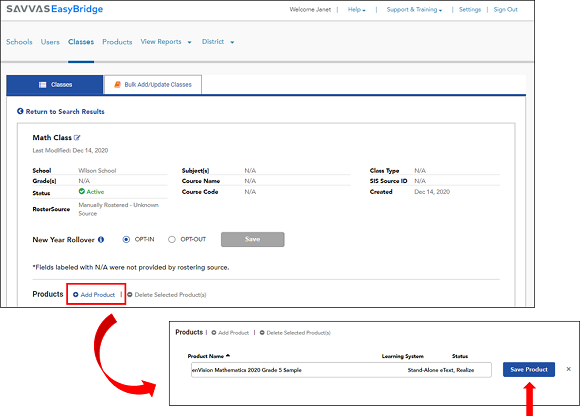
- Select the Add Product button below the class details.
- Select text box below Product Name. A list of products appears. To narrow down the list begin typing the name of the product to add.
- Select the product.
- Select the Save Product button.
Delete Products from Classes
- Sign in to EasyBridge.
- Filter classes to quickly find the class to remove a product.
- Select the class name. The class details page appears.
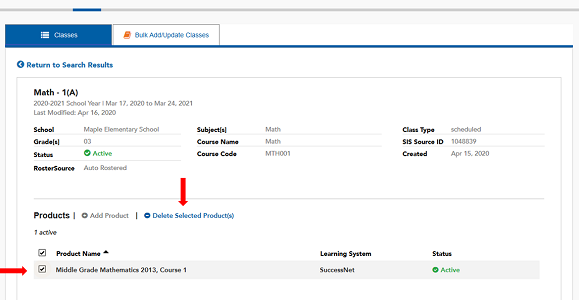
- Check the box to the left of the product name.
- Select Delete Selected Product(s).
Removing a product from a class results in permanent data loss. Only remove a product from a class when the teacher no longer needs access to that course for the class.
See Also


