Add Products to Classes
Adding products to your classes is an important step that allows your students to be able to login and begin using the curriculum you have assigned. Follow the steps below to get started adding products to your classes on EasyBridge.
Steps to add products to a class
- Login to SavvasEasyBridge using the steps provided by your administrator.
- Select the Current or Future tab on the Classes & Products screen.
- Find the class for which you would like to add products.
- Select Add Products or Manage Products. If no products have been added to that class, Add Products will display. If there are already products added to the class, Manage Products will display.
Teachers cannot manage curriculum products for classes on the Past Classes tab.

- Products that have already been added to your class will display at the top of the window for quick reference. Use the Platform and Product Name filters to help quickly locate additional products to add to your class. Adding a product to a class uses one license subscription for each student. Check with your administrator if you have any questions or concerns about your district's license subscriptions.

- Place a check mark to the left of the curriculum product(s) you would like to add to the class.
- Select Save.
If you are adding MathXL® for School to your class, you have one more step to complete so that your students can begin using the learning platform. Select the MathXL® for School (for all courses) link. Then select your math course, using either the filter by course, or scroll. Select Save. Your MathXL® for School course will appear directly below your class name.
You still need to select your MathXL® for School course even if your administrator adds products to your classes. If you need to remove the MathXL® for School course and select a new one, contact Savvas Technical Support to complete removing the old course
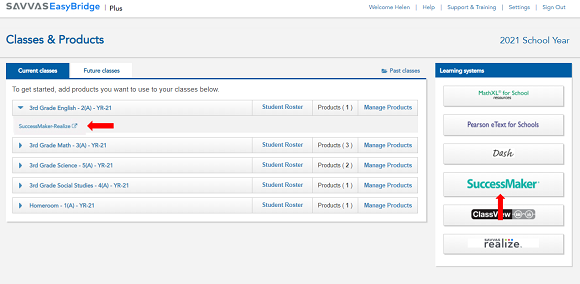
There are two ways to access your SuccessMaker class from EasyBridge after it is added it as a product.
- Expand the class to see the products. Select the SucessMaker-Realize link. A new web browser automatically opens and takes you to Realize. To learn more about navigating to your program in Realize, go to Browse Content by Program.
- If you do not see your program in Realize, see Add More Programs help.
- Alternatively, select the quick link for SuccessMaker under Learning systems to the right of your classes. This takes you directly to SuccessMaker in a new web browser.