Google Classroom Linking
If your district has enabled Google Classroom™ Linking, you can connect an existing auto-rostered class in EasyBridge or Realize with a Google Classroom™ class by Linking them together. This prevents duplicate classes from appearing in Realize.
Auto-rostered classes without a product assigned will only appear in EasyBridge. Auto-rostered classes with a product assigned will appear in EasyBridge and Realize; either one can be connected to Google Classroom™.
-
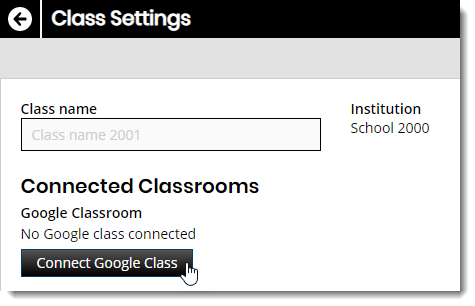
Select Classes on the top menu bar, select a class, and then select Settings below your class. You can also select the Import Google Classes button on the Classes page to start the class Linking or Importing process.
-
Select Connect Google Class.

If you do not see the Connected Classrooms section, you may have selected a non-auto-rostered class (if present) or Google Classroom™ Linking has not been enabled for your organization. For more information or support, contact your administrator or Savvas to confirm or change this setting for your school or all district schools if desired.
-
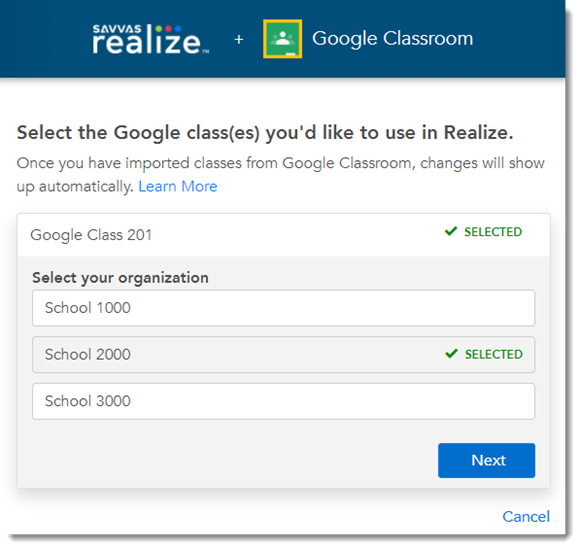
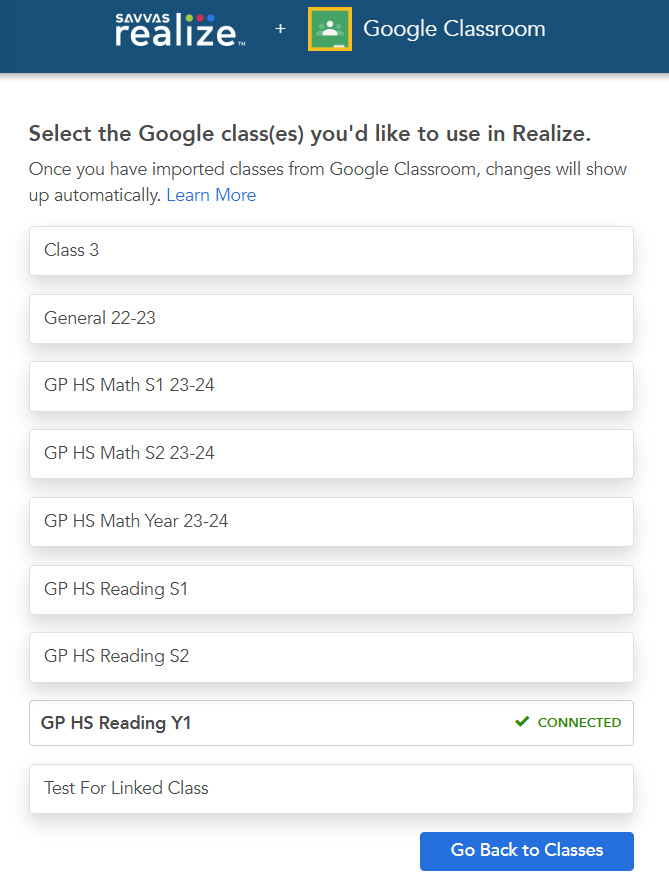
Select the Google Classroom™ you want to connect, select your organization, and then select Next.

-
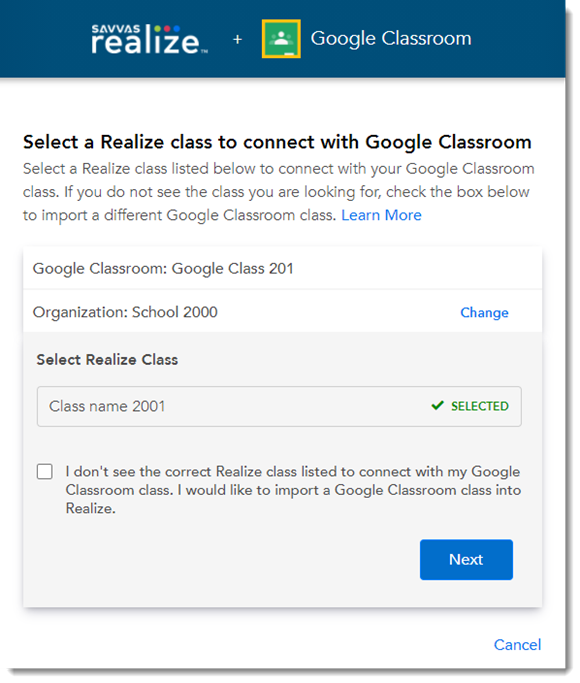
Select the Realize class you want to connect the Google Classroom™ class to, and then select Next.

If you do not see the Realize class listed that you want to connect to, the auto-rostered class may not be present for you or is already connected to Realize by yourself or another teacher. Select the Cancel option to stop the class Linking process or select the check box next to I don't see the correct Realize class listed to connect with my Google Classroom™ class, and then select Next to Import the Google Classroom™ class into Realize instead of Linking the class. This will Import (meaning add) the class into Realize rather than Link it to an existing EasyBridge or Realize class.
-
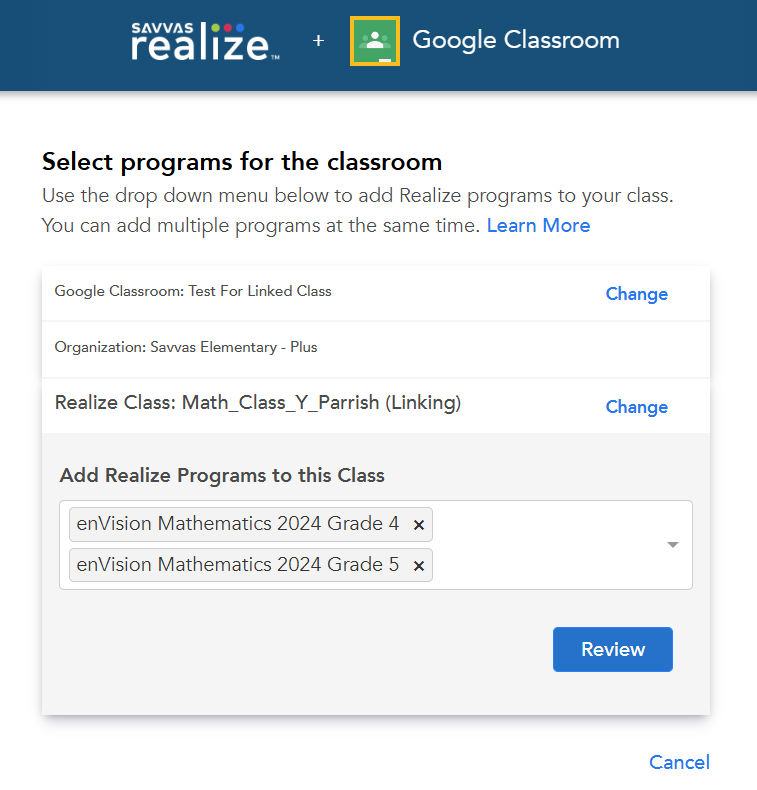
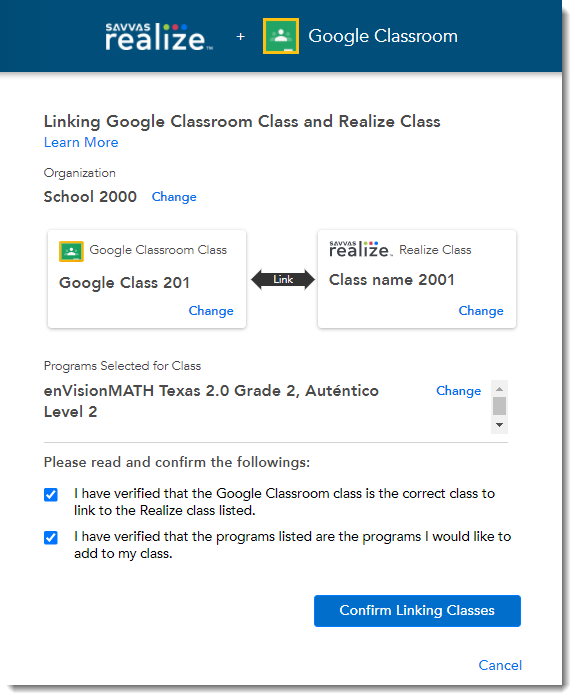
Select the Realize programs you want to make available for the class, and then select Review.

-
Whether you are Linking or Importing a class, thoroughly review the information, and then:
-
If any information is incorrect, select Change next to the option you want to change.
-
If you want to cancel the Linking options entirely, select Cancel at the bottom of the page.

-
-
If you've reviewed the information and want to proceed, select the confirmation boxes, and then select Confirm Linking Classes or Import Google Classroom™ Class to return to the Google Classroom™ selection interface.

-
In the Google Classroom™ selection interface, you can Link another class, or press Go Back to Classes to return to your Realize class list.


After you have Linked or Imported a Realize class with a Google Classroom™ class, the students in the class will receive an item titled Realize Login in the Google Classroom™ class Stream. Once students select the Link they are directed to the Account Linking process, which you can read about in more detail here.
If you inadvertently connect the wrong classes, see Disconnect a Linked Google Classroom™ Class for information about disconnecting a Google Classroom™ class from Linked Realize class.
See Also