Get Started with Google Classroom Integration
Before you can connect to Google Classroom™, ensure that you have a Google Classroom™ account, and that you have provided Google Classroom™ accounts for your students. For information about Google Classroom™, see About Google Classroom™ and verify that you meet the latest requirements for sharing. If you've previously connected your Google Classroom account to Realize, such as when first assigning a Google Doc to your class, you can skip to step 5.
You can then follow these steps in Realize:
-
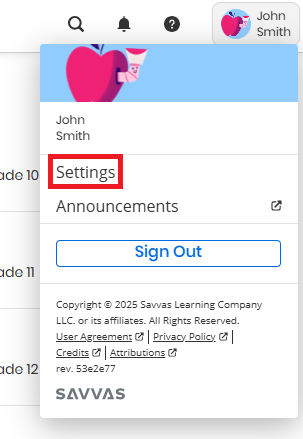
Select your name on the menu bar, and then select Settings.

- In the Account tab, scroll to the Account Linking section and select the Get Started button.

If you do not see the Account Linking option in your Realize settings, Google™ integration may not be enabled for your school district. Contact your administrator.
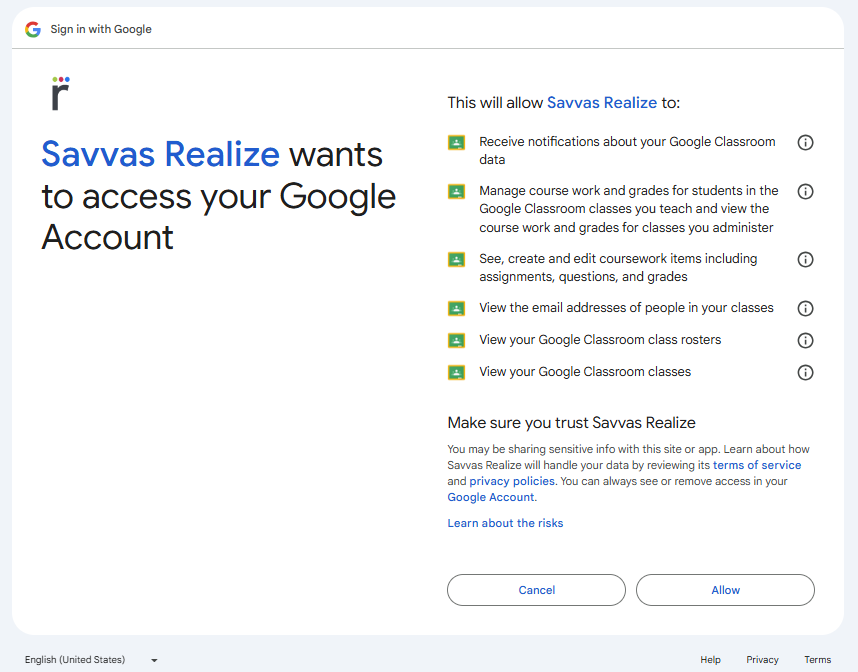
- When prompted, select or enter your Google Classroom™ sign-in information.
-
Review and approve the permissions you're giving to Realize. These changes allow Realize to read data from your Google Classroom™ account and send data such as assignments and grades to your Google class only after it is connected to Realize. Select the Allow button at the bottom of the screen to complete this step.

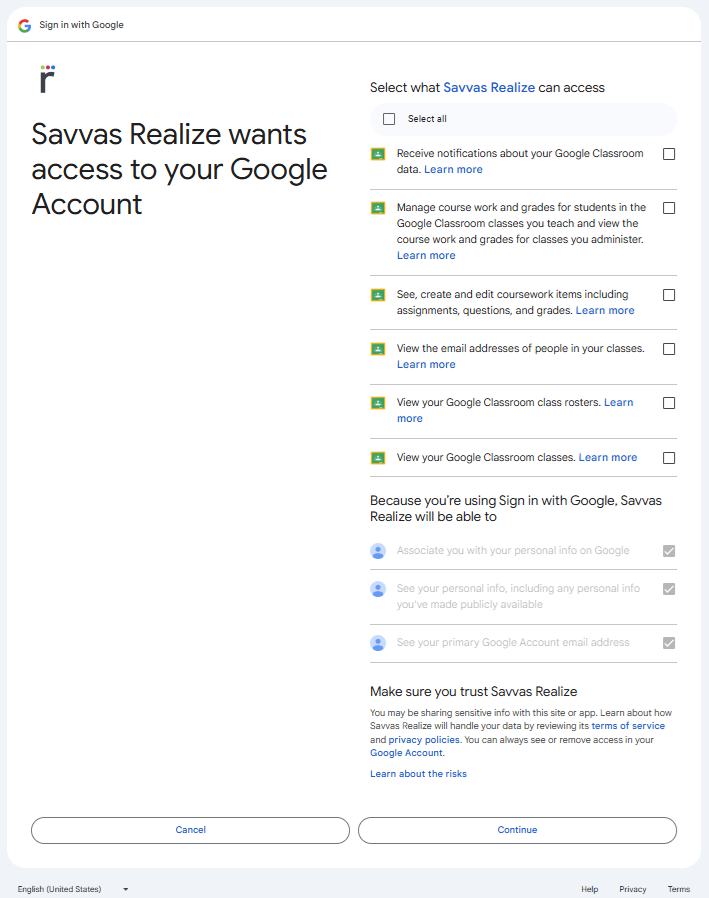
Depending on district settings, you might see a different version of this screen with checkboxes next to each option, like the image below. If you see this version of the Google Classroom permissions screen, check the Select all checkbox, then select Continue.

To avoid seeing the granular permissions page, the user's Google workspace administrator should authorize Savvas Realize in their admin console.
-
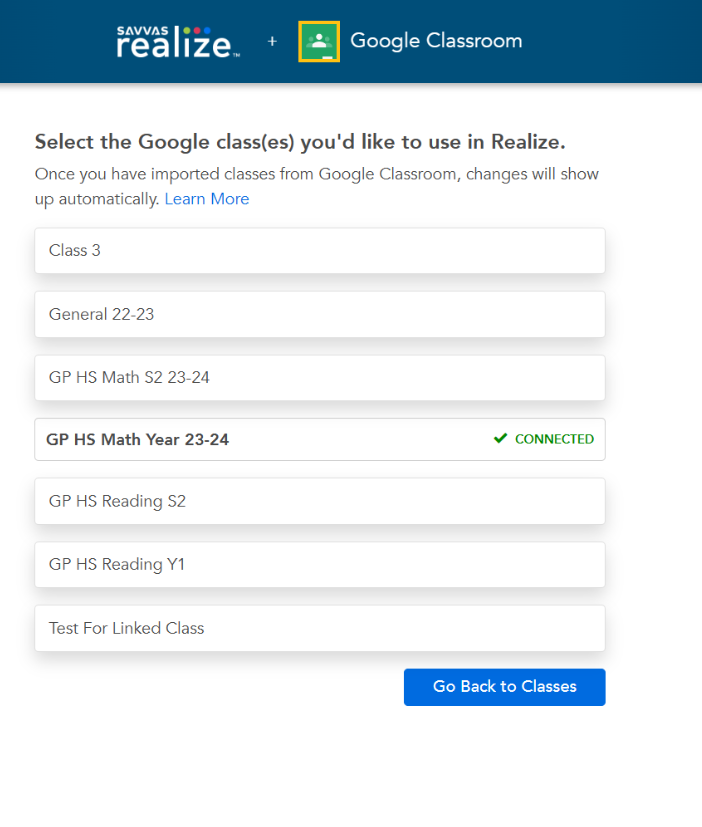
After the previous step has been completed, your Realize account is now connected with Google Classroom™. We will automatically take you into the process of connecting your first class. You can repeat this process in the future from the Classes page as needed. To continue with this process, continue with the next step below. To exit this process, select either Back to Realize if there are no Google Classroom™ classes to select or select Cancel at the bottom of the Google Classroom™ class list provided.
The option to Link and/or Import classes is based on your EasyBridge type (Plus, Auto, Basic) and configuration (Google Class Linking). All customers will have access to Import classes and by default, EasyBridge Plus customers will have the ability to Link classes if Google Class Linking is On as seen on the EasyBridge administrator schools page.
-
Select the Google class you want to connect with Realize and then select the Next button. On the next screen select to Link or Import the class. Linking the class is recommended and will match the class to an EasyBridge class and add it to Realize if not already present, Importing the class will add the class to Realize.
- Select the Realize programs you want to use with the class, and then select Review.
-
Review the full summary of the planned class to Link or Import with Realize. Check the selection box for confirmation of the planned class to be connected with Realize, and select the final confirmation button presented to complete the process.
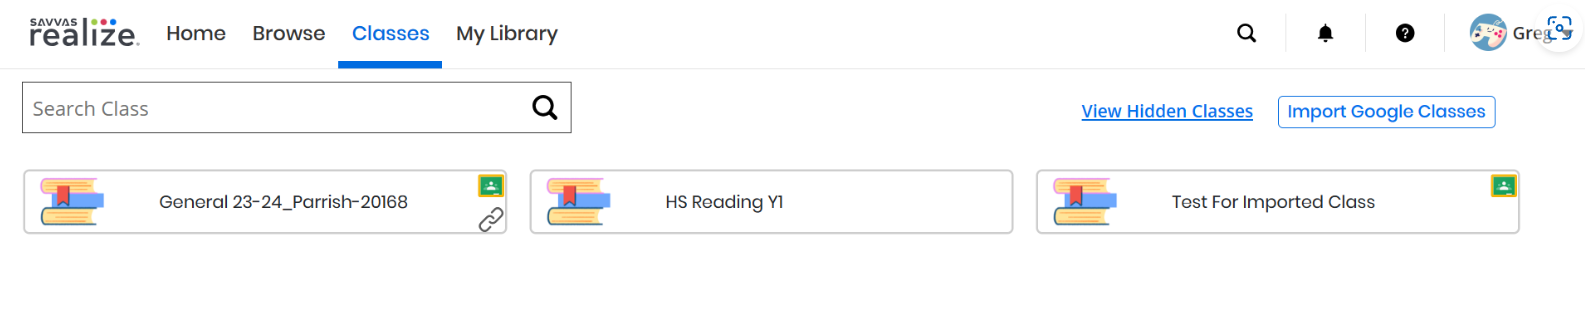
- Select Go Back to Classes. Classes that were connected with Google Classroom™ appear in your class list with a Google Classroom™ icon to the left of the class name.


The first time students access a Realize assignment from Google Classroom™, they are prompted to provide their Google Classroom™ sign-in information and grant Realize access to their Google Classroom™ account. Until students grant Realize access to Google Classroom™ or link their account, students see Needs to connect on the Students & Groups page or they will not yet be present in the class roster on this same page. Absent or missing students are expected for Imported classes. See Google Classroom Overview for more information.

See Also
Add Students to a Google Classroom™ Class
Edit a Student Imported From Google Classroom™