Assign Content to Students
You can assign content to your class, groups, or individual students using all of the accompanying materials in your programs![]() A program is a product your school or district has purchased..You can find content by selecting a program using the steps below, by browsing all content, or by choosing custom content from My Library.
A program is a product your school or district has purchased..You can find content by selecting a program using the steps below, by browsing all content, or by choosing custom content from My Library.
To add more programs, select Settings. See Program Settings for more information.
Assign Content by selecting a Program
- Select Browse on the top menu bar, and then select the program. Depending on the program, content items may display an item type or status icon and have additional options.
-
 See Item Type or Status Icons
Icon Description 
Locked—This item is for teacher use only. You cannot assign this item to your students. 
Hidden—This item is currently hidden from your students. Once you assign the item, your students will be able to see it. 
Realize Reader Selection Realize Reader Selection (RRS) assignments open directly in Realize and focus on the specific text and features required to complete the assigned activities. (RRS)
Counts towards standards progress—This item counts towards standards progress. - Assign—Assign the item to students.
- Add to Playlist—Add the item to a playlist.
- Info—View a full description of the activity.
- Customize—Customize a lesson or customize a Savvas program test.
- Versions—Edit or assign a custom version of a test.
- Rubric—Open the assignment and preview the rubric criteria.
- Teacher resources—View available resources.
-
Remediation—Assign remediation to your students.
- Standards—View Standards associated with Content.
-
To select and assign content, choose one of the following actions:

- If an arrow displays to the right of the activity, press it to drill further into the content.
- For single-activity assignments, press Assign next to the required activity.
- For multiple separate assignments, select Select all assignable items checkbox at the top left, to assign all of the activities. Unselect the same checkbox to unselect all.
If you select a SuccessMaker Topic Prep assignment, the assignment opens to the assignment details page of SuccessMaker in a new tab or window. When you assign Topic Prep content to your students from within SuccessMaker, you can view the content and monitor progress within Realize. Changes to the assignment’s status are sent to Realize, such as if the assignment is paused, unpaused, or deleted. For more information about assignments in SuccessMaker, visit here.
You can also assign content from the content itself using the action toolbar:

-
In the action toolbar of the content, you can expand the content view by pressing the
 button, as well as view the estimated time it takes to complete the content.
 - After selecting the required check box(es), you can also add the selected activities to a playlist by pressing the Add to Playlist (x) button at the bottom of the page, next to Assign selected button.
By pressing the 3-dot action menu, you may have access to the following options depending on the content you have selected:
- Information—View a full description of the activity.
- Customize—Customize a lesson or customize a Savvas program test.
- Teacher Resources—View available resources.
- Remediation—Assign remediation to your students.
- Download—Download an eligible assignment.
- Tools—Use tools to customize your curriculum content.
- Standards—View state standards applicable to the assignment.
- Once you select the Assign button, the Create Assignment wizard appears.


-
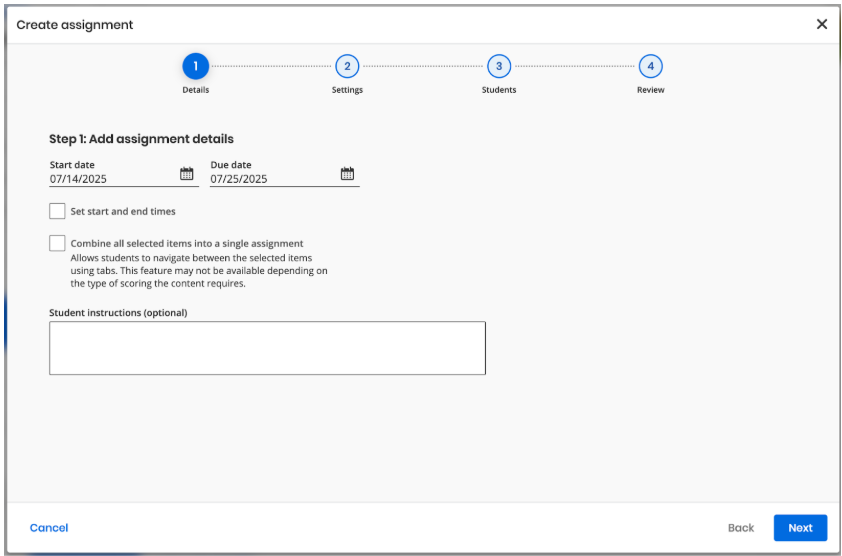
Step 1: Add assignment details: The teacher can set basic assignment information like title, start and end date, and instructions.

-
Title: Enter a title.
-
Start date and Due date: Choose the Start and End dates from the calendar provided.
-
Select the Set start and end times checkbox, the time selection section appears. Specify the start and end times for the assignment using the entry field or the dropdown provided.
-
Select the Set student time of day access checkbox to set the Student's time of day access.
-
The time slot opens below to set the From and To times. Select the times by using the drop-down arrows within the box to set the precise daily start and end times for assignment access.
-
Editable only if the start time and date has not passed.
-
Teachers can override the time access window entered by admins for any admin created assignment.
-
-
Select Combine all selected items into a single assignment checkbox to combine all items into a single assignment, allowing students to navigate between the selected items using tabs. This checkbox is available only if you are assigning more than one content.
-
You cannot change the start date for an assignment once it has been assigned and the start date has passed.
-
Students can turn in an assignment after the assigned due date and time; however, the status will indicate the assignment was late.
-
-
Student Instructions (optional): You can enter any additional instructions to the students.
-
Select Next button to go to the next step.
-
-
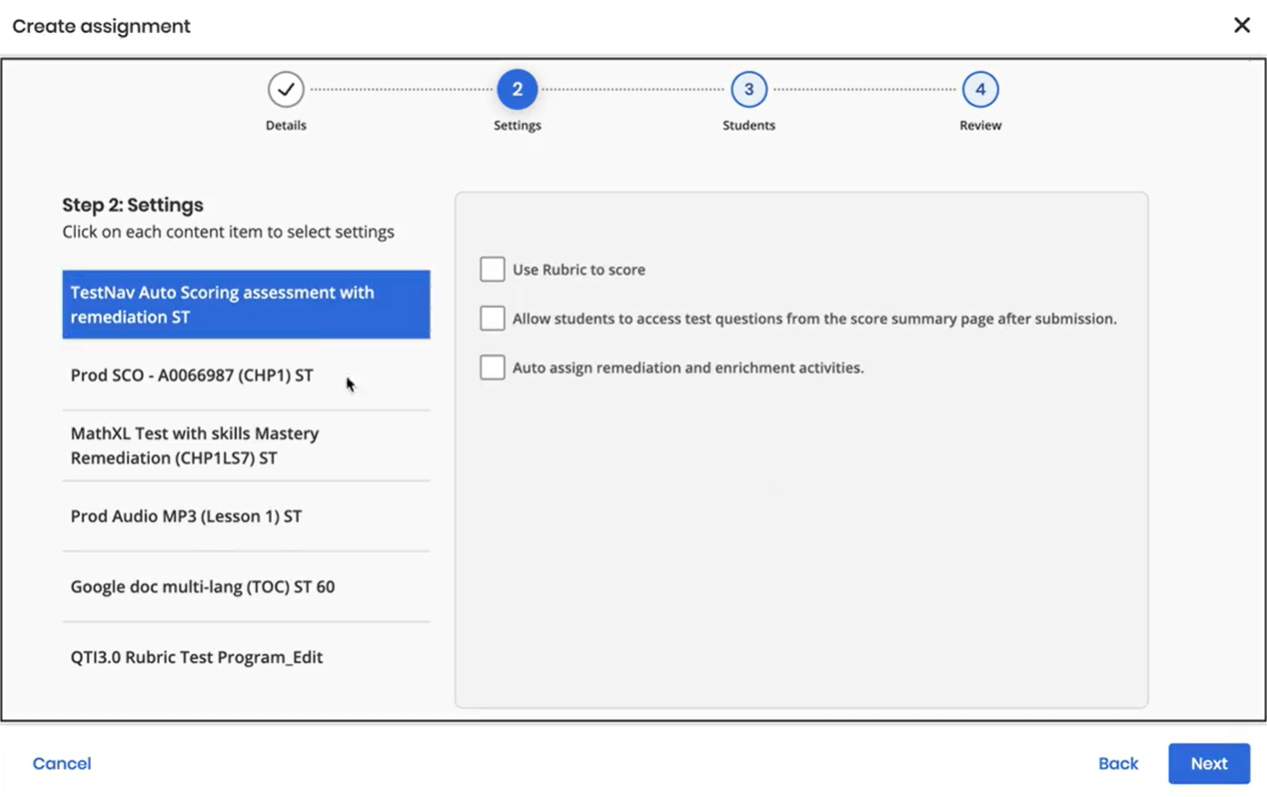
Step 2: Settings: The teacher can select more detailed assignment settings based on the type of content chosen.

-
The checkbox(es) appears based on your selected content. Some content items may not have any settings.
-
Select each content item from the left pane to select the associated settings on the right pane.
-
Select or Unselect the checkbox(es) according to your needs.
Following are some of the options:
-
Use Rubric to score
-
Allow students to access questions after submission
-
Auto assign remediation and enrichment activities
-
-
Select Next button to go to the next step.
-
Select Back button to go to the previous step.
-
-
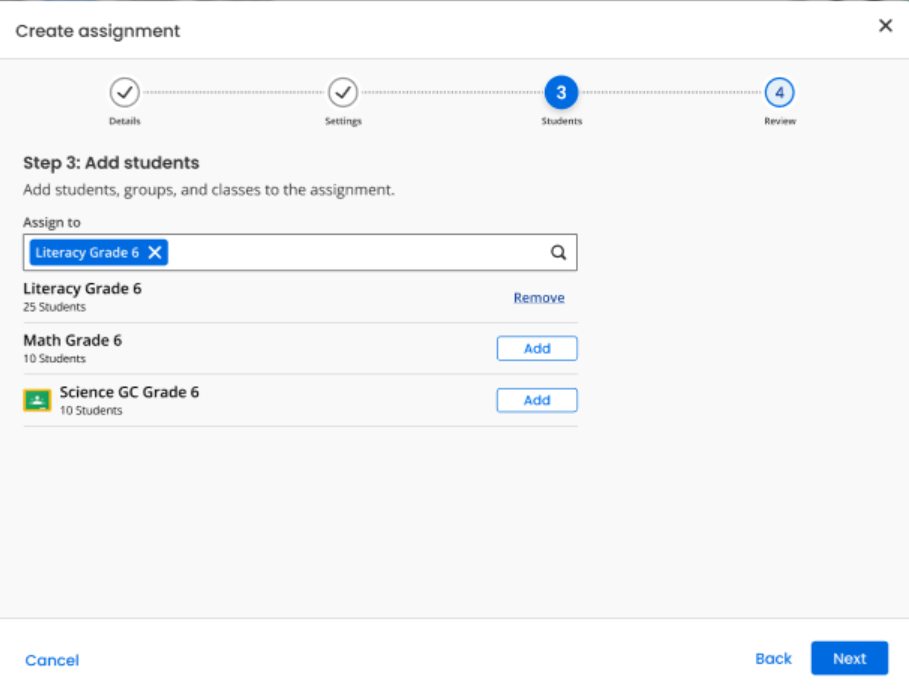
Step 3: Add students: Add students, groups, and classes to the assignment.

-
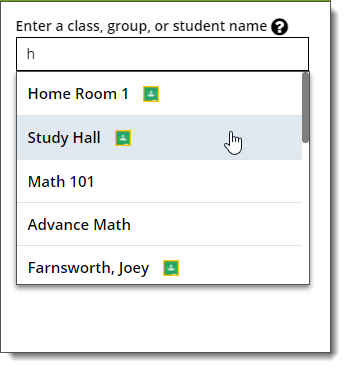
Enter the name of the class, group, or student you want to assign to by using smart search. Enter the first letter and scroll to the class, group, or student. Search for students using the format of Last Name, First Name.
List of class, group, or student(s) appears below.
-
Select Add button beside the required class, group, or student(s).
-
Select Remove to remove the class, group, or student(s) from the list.
-
Select Next button to go to the next step.
-
Select Back button to go to the previous step.
-
-
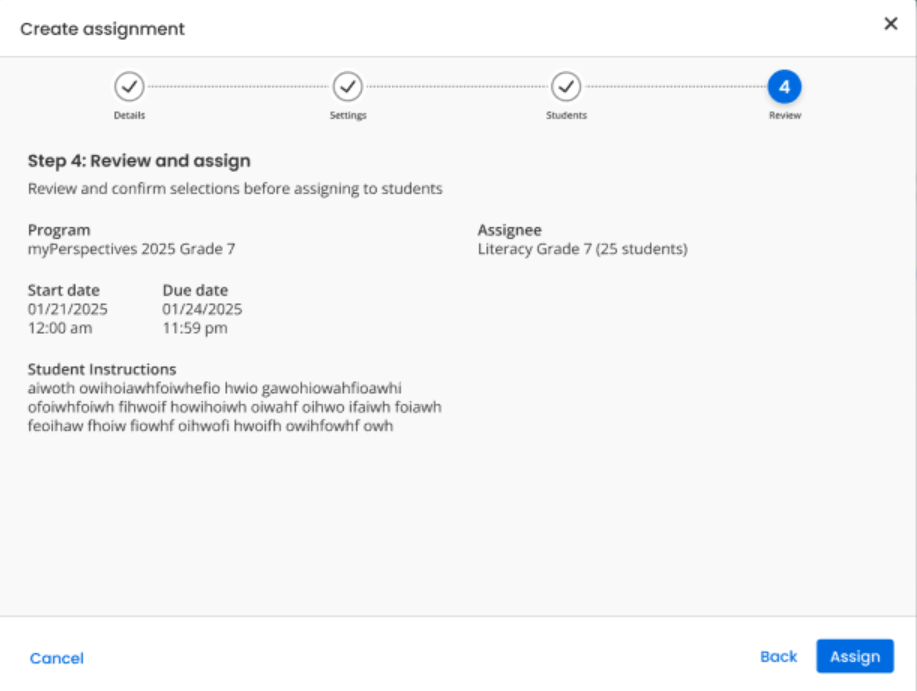
Step 4: Review and assign: Review and confirm sections before assigning to students.

-
Select Assign button to assign to students.
-
Select Back button to go to the previous step to make any changes.
-
While assigning multiple separate activities:
-
The Title section will not be visible while assigning multiple separate activities. You must finish the assigning function and navigate to the Assignment listing page, select the respective item to change the title name, if needed.
-
The title will be auto-filled as the "Content title" if the multiple assignments are being created.
-
Essay Scorer and SavvyWriter cannot be a part of the multipart assignment.
-
A success confirmation message, "X assessments were created", appears at the bottom of the page after you have created the assignment.
-
A warning message box appears if any errors occurred during the creation of the assignments.
If the assignment contains items with remediation, an option to automatically assign remediation activities is available to select.
- Use the calendar to choose a Remediation due date.
- Select the check box if you want remediation activities automatically assigned.
You can configure your assignment to allow students to see their scores after they have submitted their work. To let students view their scores, check the box that says "Allow students to access questions after submission."
-
Students and classes imported from Google Classroom™ display with a Google Classroom™ icon next the name.

Before you assign Realize content to an imported Google Classroom™ class, ensure all students have accepted the invitation. Students do not receive assignments that were assigned to a class prior to accepting the Google Classroom™ invitation.
- Students in classes linked using Google Classroom™ Account Linking must select the Realize Login item in their class Stream to connect to Realize. Until then, they will not receive assignments from Realize
See Also
Need more? Visit My Savvas Training for on-demand tutorials, virtual professional learning, chat, and email support.